Conveyor Pulley lagging plays a critical role in improving the friction between conveyor rollers and belts and extending their lifespan. Cold rubber pulley lagging is a widely used on-site method that involves applying adhesives or rubber compounds to the roller surface and allowing them to cure at room temperature.
In underground coal transportation systems, rollers are essential for efficient material handling. Proper pulley lagging installation can significantly enhance conveyor performance, preventing belt slippage. However, the harsh underground environment—characterized by high humidity, airborne particulates, and corrosive gases like CO₂, NO, NO₂, and SO₂—can compromise the quality of roller lagging. Therefore, stringent control over the conveyor pulley lagging process is necessary to ensure optimal performance under such conditions.
Step 1: Preparation Before Pulley Lagging Installation
1, Environmental Assessment
Measure the ambient temperature, humidity, and the roller’s surface temperature.
If condensation forms on the roller due to environmental conditions, adjustments (e.g., heating or dehumidification) are needed to prevent adhesion issues.
2, Space Evaluation
Assess the available space around the roller to determine if it can be worked on in situ or needs to be removed. Insufficient space for safe grinding and bonding requires dismantling the roller for off-site processing.
3, Electrical Supply
Ensure an adequate power supply, matching the voltage and power requirements of the tools.
Verify transformer capacity to avoid interruptions during the process.
4, Tools and Materials Preparation
Tools: Angle grinders, tungsten carbide buffing discs, rubber hammers, pressing rollers, wire brushes, cleaning agents, and measuring tools.
Materials: Conveyor rubber pulley lagging, cold vulcanization adhesive, metal primer and seam sealant.
5, Site Condition Check
Ensure the area near the roller is flat, clean, and dry. Minimize dust and water, as both can interfere with adhesion. If the temperature is too low, use halogen lamps to raise the ambient temperature.
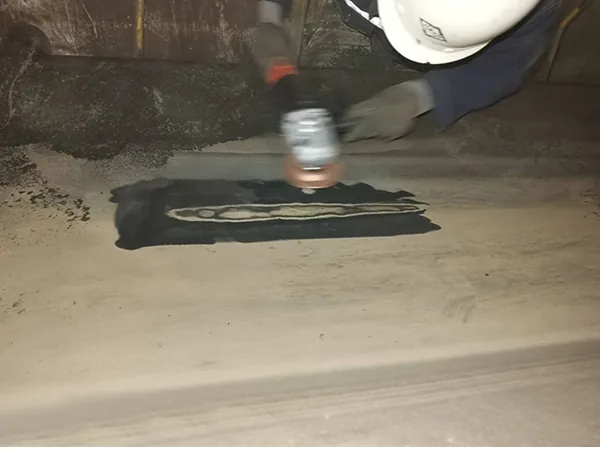
Step 2: Surface Preparation
1, Grinding
Use an angle grinder with a tungsten carbide buffing disc to remove oxidation rubber layers and residues from the roller surface. Create a uniformly rough texture to enhance the adhesive bond.
2, Cleaning
Thoroughly clean the roller surface with a cleaning agent to remove debris and oil residues from the grinding process.
3, Metal Primer Application
Apply a uniform layer of metal primer to the cleaned surface using a brush.
Ensure complete coverage without gaps and allow the primer to dry fully before proceeding.
Step 3: Applying Cold Vulcanization Adhesive
1, Adhesive Preparation
Mix the two components of the adhesive according to the manufacturer’s instructions ( 100:4 ratio).
Use the mixed cold vulcanizing adhesive within two hours to maintain its effectiveness.
2, Adhesive Application
Apply the adhesive evenly across the roller surface. Typically, two layers are needed:
Allow the first layer to dry completely before applying the second. Before attaching the rubber sheets, let the second layer dry to a tacky (but not sticky) state.
Step 4: Bond to The Conveyor Pulley Lagging
1, Cutting the conveyor pulley lagging
Cut the rubber lagging sheet to match the roller’s dimensions, ensuring a precise fit.
2, Preparing the conveyor pulley lagging sheet
Apply a layer of adhesive to the back of the conveyor pulley lagging sheet and let it dry naturally for optimal bonding.
3, Attaching the conveyor pulley lagging sheet
Carefully position and attach the conveyor pulley lagging sheet to the drum, starting from one end and smoothing it out to avoid air bubbles and wrinkles.
Step 5: Compression and Finishing
1, Compressing the Rubber
Use a pressing roller or rubber hammer to firmly press the lagging sheet onto the durm, starting from the center and working outward. Ensure tight adhesion and eliminate trapped air.
2, Seam Sealing
Trim the conveyor pulley lagging sheet edges to align with the roller.
Use seam sealant to fill gaps at the joints, ensuring a smooth and durable finish.
Step 6: Curing
1, Curing the Adhesive
Allow the roller to cure in a controlled environment, ensuring appropriate temperature and humidity levels for the adhesive and rubber material.
2, Quality Inspection
Inspect the roller for uneven surfaces, weak adhesion, or defects. Address any issues promptly.
Step 7: Installation and Testing
1, Reinstallation
Reinstall the lagged roller onto the conveyor system.
2, Operational Testing
Perform no-load and full-load tests to confirm the roller’s performance and ensure no belt slippage occurs.
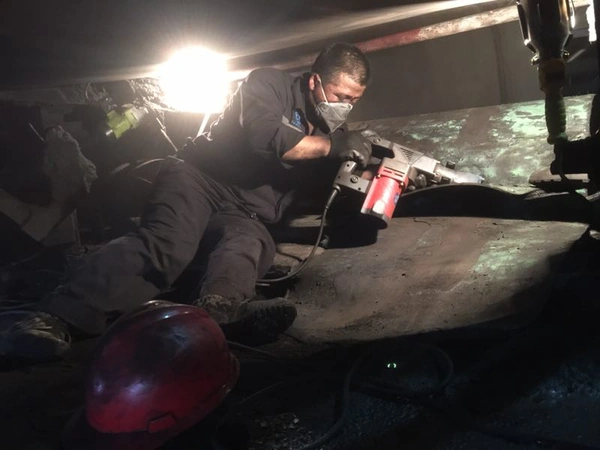
Safety and Material Compliance
Always follow safety protocols during on-site operations, including ventilation and fire prevention measures. Ensure all adhesives and materials meet explosion-proof and fire-resistant standards required for underground mining operations. This systematic approach to roller pulley lagging not only enhances friction and longevity but also ensures reliability and safety in demanding underground environments.