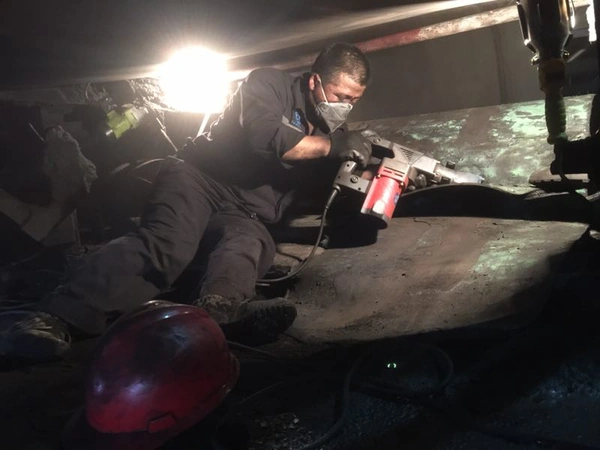
In the demanding environment of bulk material handling, your conveyor belt is constantly subjected to heavy material impact and abrasive wear from sharp objects. Over time, this inevitably leads to various types of damage—ranging from minor cover gouges to severe punctures and long-distance longitudinal tears.
One of the most critical rules in bulk handling is this: Never continue running a damaged conveyor belt. Ignoring minor damage invariably leads to catastrophic belt failure (total tearing or snapping), which not only causes massive production downtime but also incurs the exorbitant cost of replacing the entire belt.
Timely inspection and proactive maintenance are essential. By choosing quality conveyor belt repair materials and strictly following a standard operating procedure, your repaired belt can maintain its original durability and significantly extend its service life.
Below is the industry-standard cold vulcanization process for safely and effectively repairing conveyor belts.
Standard Conveyor Belt Repair Procedure (Step-by-Step)
Step 1: Gather the Right Conveyor Belt Repair Materials
A professional repair requires professional tools. Before starting, ensure you have the following on hand:
Low-speed angle grinder, Tungsten carbide buffing disc, Compaction roller (stitcher roller), cold vulcanizing adhesive (cement). Rubber repair strip (for longitudinal tears), or Rectangular Patches(For the repair of damaged belt covers), or Diamond repair patch (for localized punctures), cleaning solvent
Step 2: Surface Preparation (Building a Solid Foundation)
The success of any cold vulcanization repair relies entirely on surface preparation.
Marking: Outline the damaged area with a specialized marker.
Buffing: Use the angle grinder with a tungsten carbide disc to thoroughly buff the damaged area. You must remove all aged rubber, oxidation, and oil contamination until you reach a dry, roughened, and textured rubber surface.
Cleaning: Sweep away the rubber dust and rigorously clean the buffed area using the cleaning solvent. Allow it to evaporate completely.
Step 3: Applying Cold Vulcanizing Adhesive (Maximizing Bond Strength)
The Belt Surface: Using a short, stiff-bristled brush, apply the cold vulcanizing adhesive to the completely dry, buffed area in a single, uniform direction. Apply two coats. Allow the first coat to dry completely. The second coat should be allowed to dry until it reaches a “tacky” state (it should feel slightly sticky to the back of your finger, but not transfer to your skin).
The Conveyor Repair Material: If you are using Beltcare Solution’s conveyor belt repair strip or diamond repair patch equipped with a CN (semi-vulcanized) bonding layer, you do not need to buff the patch. Apply one coat of adhesive to the patch. This creates a stable, chemical cross-linking vulcanization reaction.
Crucial Warning: Avoid applying the adhesive too thickly. Thick pooling causes uneven drying, traps solvents, and will ultimately lead to bubbling and delamination.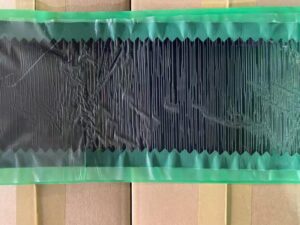
Step 4: Application and Compaction (Eliminating Air Pockets)
Once the adhesive has reached the perfect tacky state, precisely align the rubber repair strip over the damage. Ensure the strip completely covers the gouge or tear (for minor punctures, a diamond repair patch is enough).
Rolling: Immediately use your compaction roller to press the strip down. Always roll from the center outward toward the edges.
Roll firmly and repeatedly to expel 100% of the trapped air, ensuring a tight, seamless bond between the repair strip and the belt surface. This step is the core of preventing premature patch failure—do not rush it.
Step 5: Edge Sealing and Full Cure Before Restart
Apply a bead of quick-repair glue or edge sealant along the perimeter of the repair strip and use a scraper to smooth the transition.
Curing: The physical repair is now complete, but do not restart the conveyor immediately. You must allow the adhesive to sit and fully cure. Subjecting the belt to dynamic tension and uneven loads before it has cured will cause the fresh bond to crack or delaminate.
Common Problems & How to Prevent Them
A) Blistering / Bubbles on the Repair Area
Typical causes: Uneven grinding leaves trapped air
Uneven glue application—thin areas dry fast, thick areas dry slowly; solvent not fully evaporated
Poor rolling/compaction; air not pushed out
Prevention: grind evenly and deeply enough; apply thin, uniform coats; compact from center to edge until fully tight
B) Weak Bonding / Repair Strip Peels Off
Main causes: Adhesive not aired to the correct tacky state; solvent still inside; Insufficient glue at edges/seams; Bonding surfaces get contaminated after cleaning (dust, moisture, oil);
Curing time is too short.
Prevention: Use the tacky touch test before bonding; keep surfaces clean and dry (control humidity/condensation); seal edges and respect curing time.
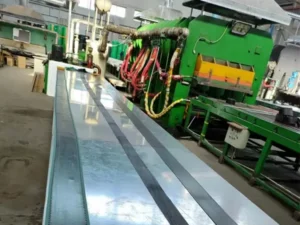
Why CN-Bond Repair Strips Perform Better
High-quality repair strips with a semi-vulcanized CN bonding layer don’t rely on “physical sticking” alone. They are designed to react with cold vulcanizing cement and form a stronger integrated bond—helping the patch become part of the belt body rather than a surface cover.