In heavy industries such as mining, smelting, ports, and tunneling, the steel cord conveyor belt is the backbone of high-capacity, long-distance material transport. Known for their high tensile strength, impact resistance, and low elongation, these conveyor belts are essential for continuous, large-scale operations.
However, traditional steel cord belts present a significant engineering challenge: the thick steel cords and heavy upper/lower cover rubber result in a massive overall belt weight. This requires larger drive pulleys, drives up material costs, and drastically increases energy consumption. For long-distance applications, traditional heavy belts become highly inefficient.
To meet the increasing demand in the market, a new generation of flexible,wear-resistant steel cord conveyor belts has emerged. While these belts are perfect for long-distance applications, their thinner, more densely packed steel cords make them susceptible to splice failures if traditional splicing methods are applied.
As experts in conveyor belt vulcanizing, we detail an optimized, high-strength hot vulcanization method specifically designed for these modern belts, utilizing premium conveyor belt vulcanizing materials to achieve a splice strength of over 95% of the original belt.
Step 1: Material Inspection (Quality Control)
A successful hot splice begins with quality conveyor belt vulcanizing materials. Before any cutting begins, the raw materials must be tested for compatibility and strength.
Pull-Out Strength: Using a standard ∮6.0mm steel cord embedded 5cm into the rubber and cured for 35–40 minutes, the cord pull-out strength must be ≥1120 N/cm.
Adhesion Strength: The uncured intermediate rubber (often called tie gum or skim rubber) must exhibit an adhesion strength to the steel cords of ≥1456 N/cm.
Step 2: Preparation of Hot Splicing Solution
To ensure maximum chemical bonding during vulcanization, a custom rubber cement (rubber solution) must be prepared approximately three days before the splicing operation.
Cut the uncured intermediate rubber (tie gum) into small pieces.
Place the pieces in a sealed container and add a highly volatile solvent (such as #120 aviation gasoline, toluene, or xylene) at a mass ratio of 1:4.
Stir continuously until the rubber completely dissolves into a uniform, smooth paste.
Crucial: Store immediately in an airtight container to prevent solvent evaporation.
Step 3: Site and Equipment Preparation
Field vulcanizing requires a clean, controlled environment.
Site Selection: Choose a location with ample space for belt handling and equipment maneuvering.
Cleanliness: Thoroughly sweep and clean the immediate splicing area to prevent dust contamination.
Conveyor Prep: Remove at least 4 sets of upper idler rollers at the splicing location to create a flat working span.
Press Setup: Position the worktable securely on the conveyor frame, followed by the lower platen of the vulcanizing press. Lay the belt ends over the lower platen.
Step 4: Splice Geometry and Centerline Marking
The architectural design of the splice is determined by the cord diameter, cord pitch, cord tensile strength, and adhesion strength.
Centerline: Establish a true centerline by marking three points at least 1 meter apart. If they do not form a perfect straight line, remeasure.
Staggered Layout: Steel cords must be staggered to distribute bending stress as the splice passes over pulleys. The standard splice gap between cord ends should be maintained at 4d ≤ ls ≤ 5d.
Note on Step Lengths: Depending on the belt rating, specific step lengths are calculated. For example, overlapping staggered cords will typically share a bonding length of 100 mm, ensuring maximum shear strength transfer.
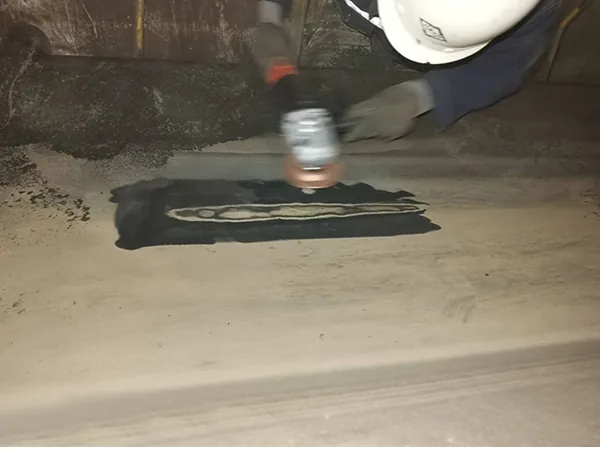
Step 5: Skiving, Stripping, and Buffing
Precision during the stripping phase prevents damage to the load-bearing steel cords.
Cutting: Cut down to the cords along the designated splice line. Flip the belt and mirror the cut.
Cord Extraction: Carefully skive away the top and bottom cover rubber to expose the cords. Never forcefully pull or bend the cords, as this causes permanent structural deformation.
Beveling: Create a smooth transition bevel (taper) at the rubber-to-cord junction.
Buffing: Lightly buff each steel cord at least 3 times using emery cloth. Warning: Do not use heavy grinders on the cords, as this will destroy the zinc coating necessary for rubber adhesion.
Roughen the transition bevels and the surrounding rubber with a low-speed grinder. Clean away all rubber dust.
Step 6: Splice Assembly (Building the Joint)
This is where your conveyor belt vulcanizing materials are put to work.
Alignment: Lay both belt ends on the lower platen. Check the centerline. Ensure a 100–150mm gap between the opposing cord ends. Secure the belts with heavy-duty edge clamps.
Cleaning & Cementing: Wash the exposed cords and buffed rubber twice using a clean towel soaked in REMA solvent. Once dry, apply 1–2 coats of the prepared hot splicing cement. Let the first coat dry completely before applying the second.
Laying the Bottom Covers: Lay down the bottom uncured cover rubber. Wash it with solvent. Lay the bottom uncured intermediate rubber (tie gum) directly on top of the cover rubber, leaving a 20mm offset.
Laying the Cords: Carefully place the steel cords over the intermediate rubber. Cords must be pulled taut, perfectly straight, and evenly spaced according to the staggered splice pattern (working from the center outward).
Closing the Splice: Fill the sides with edge gum. Wash the top layer of cords with solvent, then lay down the top layer of uncured intermediate rubber, followed finally by the top uncured cover rubber.
Trim any excess material from the edges to match the original belt width exactly.
Step 7: The Hot Vulcanization Process
Proper curing parameters are the difference between a successful splice and a catastrophic failure.
Press Assembly: Apply release fabric (PTFE) and place edge irons (edge bars) tight against the belt edges. Secure the upper platen and crossbeams.
Initial Pressurization: Tighten all bolts evenly. Apply hydraulic pressure up to 1.0 MPa (10 kg/cm²), then briefly release the pressure. Retighten all bolts symmetrically to eliminate voids, then reapply full pressure.
Heating and Degassing (Bumping): Turn on the power. When the temperature reaches 100°C, briefly release pressure to allow trapped moisture/gas to escape (degassing). When it reaches 120°C, perform a second degassing to ensure all condensation is expelled.
Curing: Continue heating to the target curing temperature of 145°C. Only begin the vulcanization timer once this core temperature is reached across all platens.
Summary: Efficiency Through Excellence
By following this optimized hot vulcanization method and utilizing high-quality conveyor belt vulcanizing materials, maintenance teams can achieve a splice strength exceeding 95% of the belt’s rated strength.
For modern tunnel boring operations and long-distance conveying, this means significantly extended splice lifespans, minimized unexpected downtime, and maximum operational efficiency